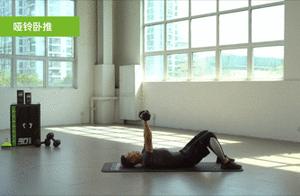
Feeling Stiffness in Joints During Exercise? Quickly Assess Your Joint Mobility!
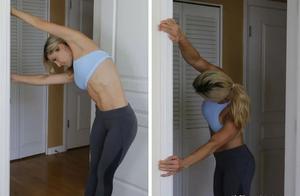
Many fitness enthusiasts often encounter the following problem during training: a feeling of stiffness in the joints, making it difficult to raise them to the desired height.
Why does this stiffness occur in the joints? Does it mean that a joint has developed a problem? In fact, it may be related to yourjoint range of motion.

What is joint range of motion?
joint range of motion refers tothe maximum range of movement a joint can achieveJoint range of motion is determined by the strength of the ligaments, tendons, muscles, and joint capsule that surround the joint. The more flexible a joint, the greater its range of motion and the more movements it can perform. Conversely, a stiff joint with a smaller range of motion limits the movements it can perform.

What is the normal range of motion for major joints?
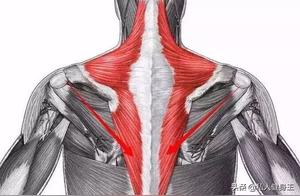
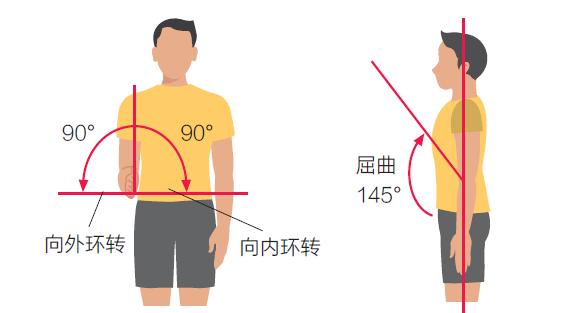
Shoulder joint


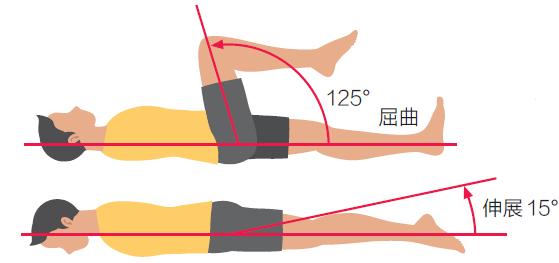
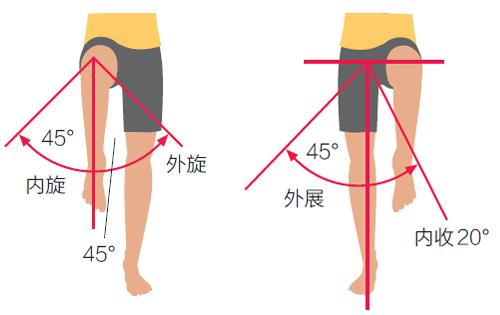
Hip joint
Forearm and elbow joint
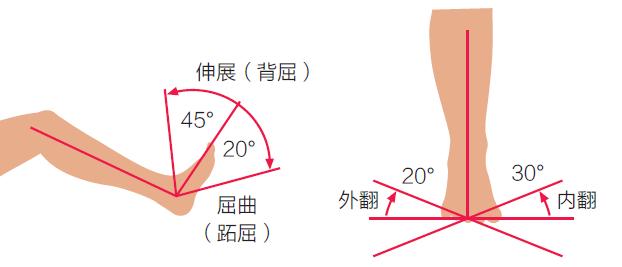
Foot joint
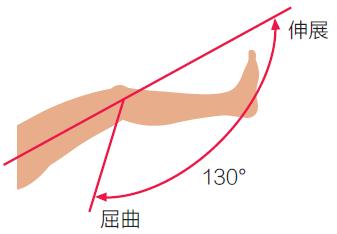
Knee joint
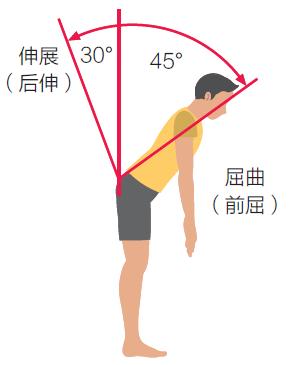
Body
Full body joints
In addition to standard ranges of motion for each joint, the range of motion varies between different joints. Activity levels are also influenced by personal strength and external forces. If you consistently feel stiffness in your joints, consider performing a joint range of motion assessment.Below is an example usingShoulder flexion assessmentusing theNASM-CES
▼
selective angle measurement method, to share the specific steps for assessing shoulder flexion. To obtain more content on joint range of motion assessment, please follow
NASM-CES American National Strength and Conditioning Association Corrective Exercise Training Guide (Revised Edition)for learning.
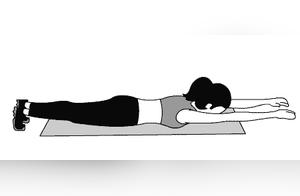
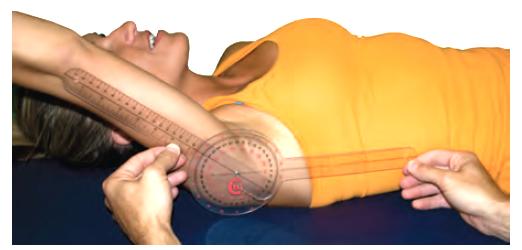
Shoulder flexion assessmentPosition:
- The test subject is in a supine position, with the humerus externally rotated 90° and the elbow flexed 90°. The forearm is at 0° of pronation and supination to facilitate the palm facing downwards. A towel can be placed under the humerus to ensure the humerus and shoulder are on the same plane. Place the palm or palm root of one hand in front of the shoulder joint.Steps:
- Place the protractor as followsAxis:
- The center of the protractor is aligned with the elbow condyleArm fixation:
Adjust to be perpendicular to the ground
Move the arm:

Adjust to the mid-radial styloid and the epicondyle
Grasp the forearm, apply downward force to passively lower the humerus until the initial resistance or compensation is noticed. Pay attention to the initial compensation felt by the hand placed above the shoulder joint. Allow the test subject to maintain this position and record the measurement results. Read the black number at the head of the moving arm.Note:Do not maintain the test subject's shoulder in a neutral position, move the limb too slowly, or fail to notice compensation in a timely manner.
When a joint lacks adequate range of motion, neighboring joints and tissues compensate for the dysfunctional joint, increasing the risk of injury.
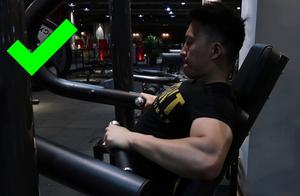
In addition to stretching before and after training, you can use the
NASM-CES

solution provided to improve it. The specific improvement scheme can be referred to
NASM-CES American National Strength and Conditioning Association Corrective Exercise Training Guide (Revised Edition)