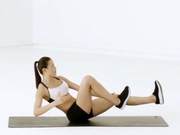
Why Were Sit-Ups Cancelled?
The latest soldier patrol assessment standards in the United States have canceled the sit-up project, as it may cause back and spinal disc protrusions.
However, many places in China are still using sit-ups as a mandatory exercise action.
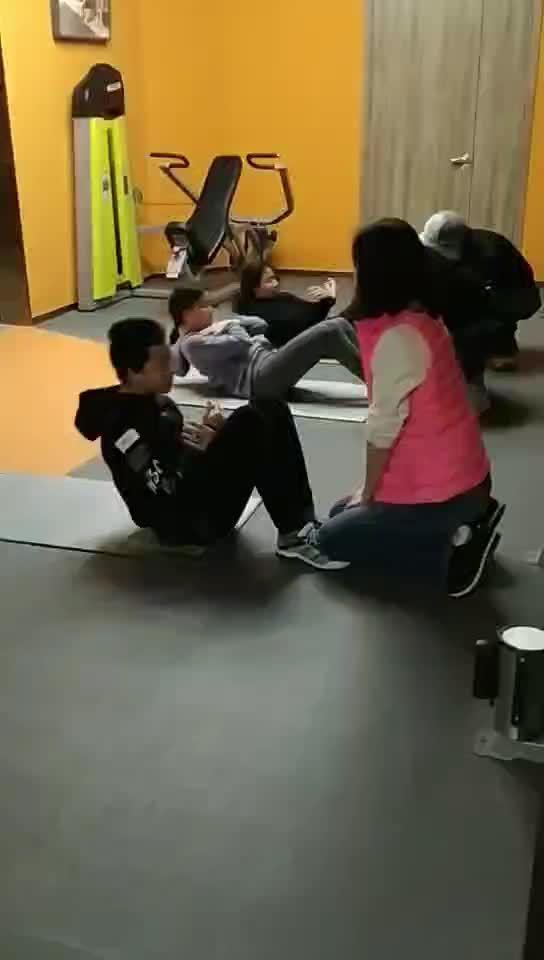
Why do sit-ups cause spinal injuries?
Spinal injuries have two reasons: overstretching or excessive loading.
Sit-ups take both of these into account:
What is over-tension?
Exceeding the limits of soft tissue movement. For example, if we make a finger-splitting action without the help of another hand, the finger will not bend to the painful angle. However, if another hand helps, the finger will gradually feel the stretching pain.

Research shows that when the lumbar spine is excessively flexed beyond 70% of its movement limit, severe damage occurs.

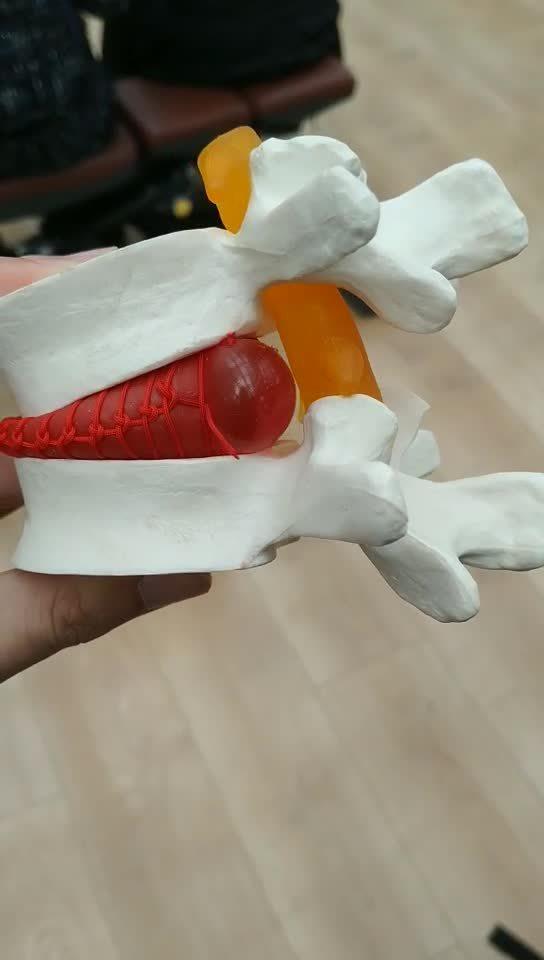
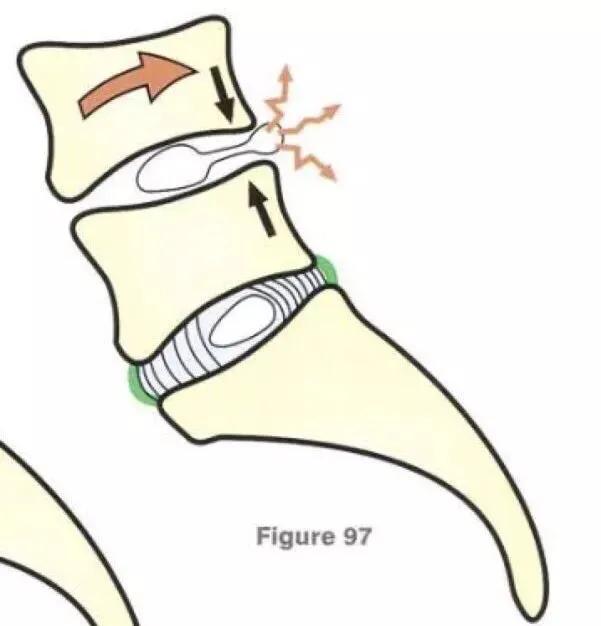
When doing sit-ups, the spinal disc is squeezed and slides backward. Pay attention to the direction of the blue arrow and the direction of the spinal disc (the black arrow in the middle). This shear force is the most dangerous.
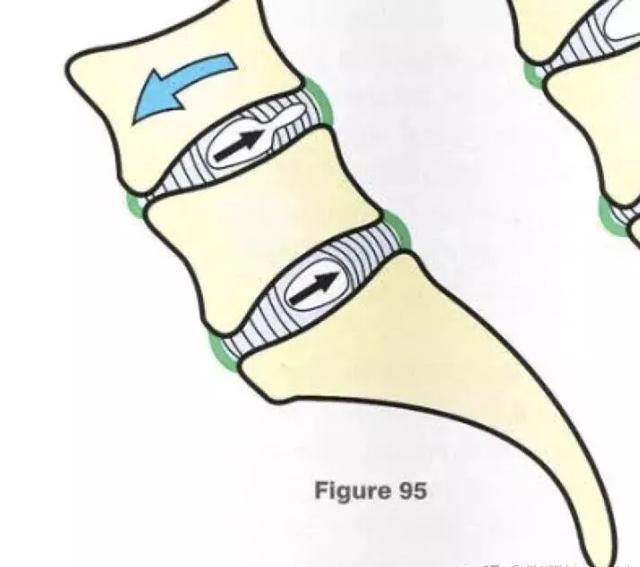
To keep the buttocks fixed at the same position, the spinal disc slides backward; combined with the pressure of your body weight, it is more likely to protrude the spinal disc.
What is excessive loading?
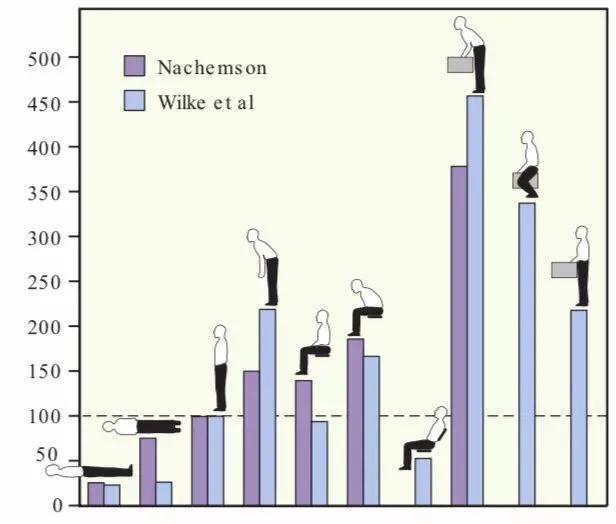
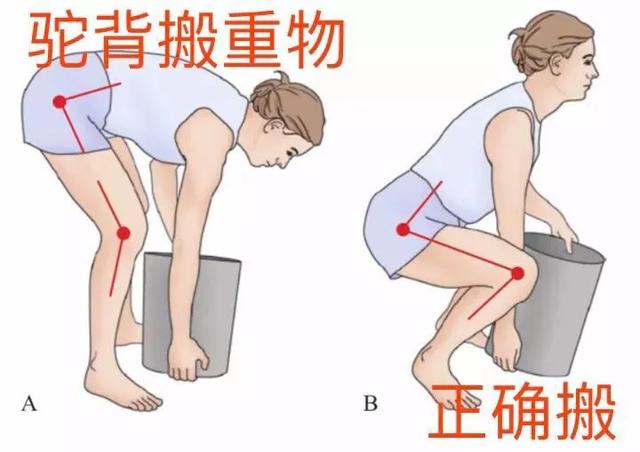
Incorrect movement patterns exceed the joint load. Research shows: hunchback lifting heavy objects increases the pressure on the lumbar spine five times compared to the normal standing position! Hunchback sitting increases the pressure on the lumbar spine by 1.8 times compared to the normal standing position!
When the spinal disc is light, it can retract; as the age increases, the spinal disc loses water and becomes harder to retract.
There are two facts: 1. Spinal discs are made of cartilage, and once injured, they cannot be reversibly damaged; 2. Spinal discs are very difficult to treat, and the effect of surgery is not good.
Now many people have spinal disc protrusions, which is largely due to maintaining incorrect postures since childhood. If a child turns to the right by 90 degrees, it is the action of sit-ups.

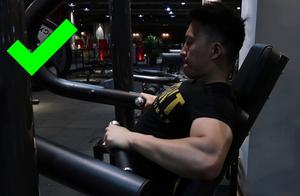
How to correctly train the core?
One: emphasize correct force patterns
1. When training or lifting weights, you must not hunch your back.
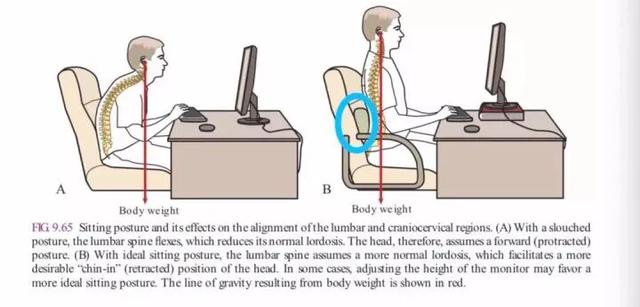
2. When sitting for learning and working, you should have waist support.
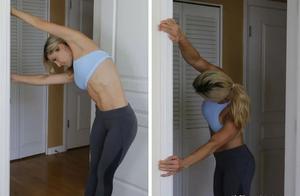
The lumbar spine is related to the health of the cervical spine. When the lumbar spine is not supported (as shown in the left figure), in order to maintain the body’s center of gravity, the head is pulled forward to cause stiffness and pain in the shoulders and neck. When the lumbar spine has support (as shown in the right figure), the cervical spine can return to normal maintenance (the ear tips, shoulders, and pelvis are on the same straight line).
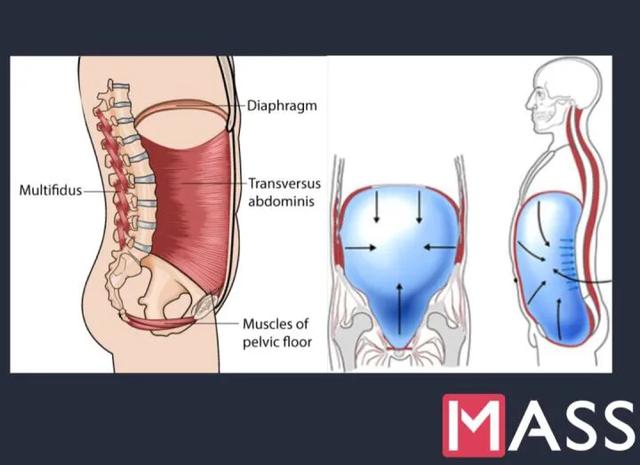
Two: learn breathing patterns
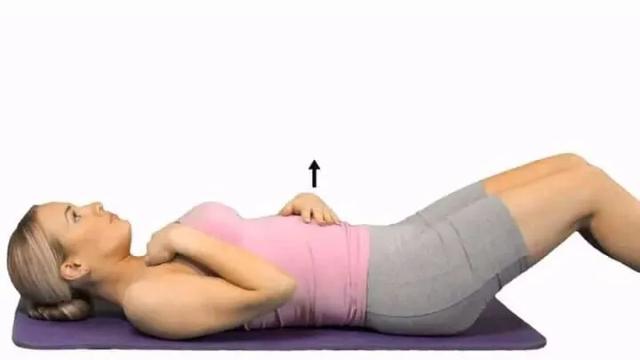
When inhaling, tighten the abdomen while the belly bulges outward. At this time, you can activate the external oblique muscles.
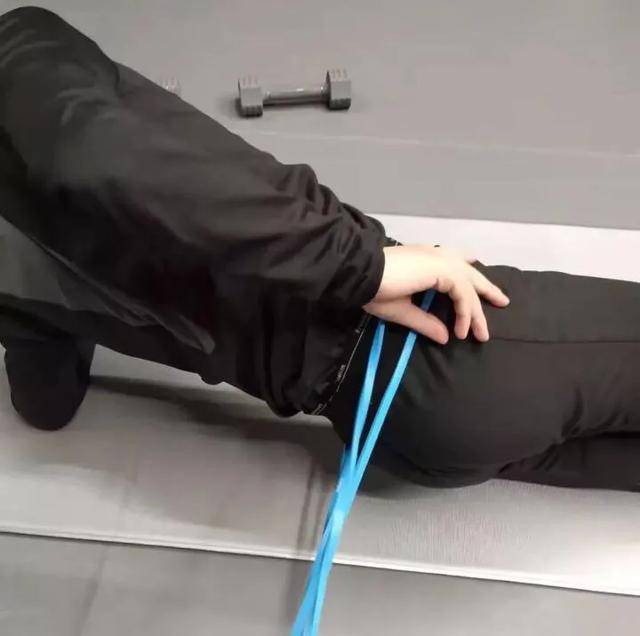
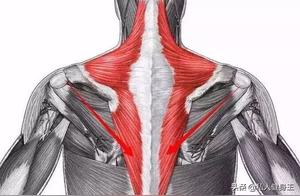
When coughing, put your hand on the back of the spine to feel the muscle force. If there is muscle trembling, it means the multifidus muscle is activated.
Doing these two exercises helps us find the feeling of core tightening after increasing intra-abdominal pressure. During walking, sitting, or exercising, we should try to maintain this abdominal tightness state.
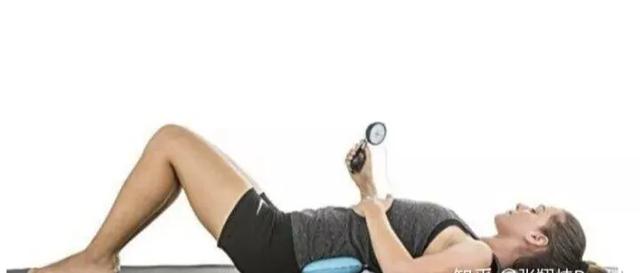
How to assess and train breathing patterns?
We can put a pressure gauge on the back. Its principle is that when the abdomen forces, the pelvis tilts back, and the trunk is pressed down, the pressure reading will increase. If you don’t have a pressure gauge at home, you can use a towel to pad your back.
When doing it: 1. Lie on your back, bend your knees, and keep your body close to the ground. 2. Place the pressure gauge on your waist and back, inflate it to 40mmhg. 3. Let the athlete inhale, avoid the interaction between the pelvis and spine, at this time the pressure should rise to 50mmhg. 4. Let the subject exhale, the pressure should remain at this pressure. Maintain repeated breathing for 3-5 times. Repeat the training 10 times.
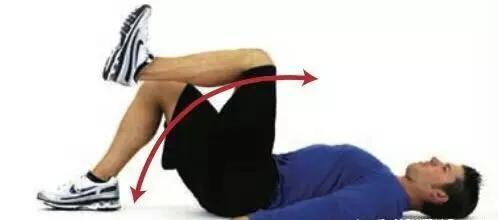
Action two: kneeling raised knee
1. Lie on your back, bend your knees, and keep your hands and feet close to the ground, focus on keeping your waist close to the ground. 2. Inhale, raise one leg, keep your knee bent at 90 degrees, so that the thigh is perpendicular to the ground. 3. Pause for 2 seconds. 4. Exhale and lower the leg. Repeat this action 10 times, combined with breathing.
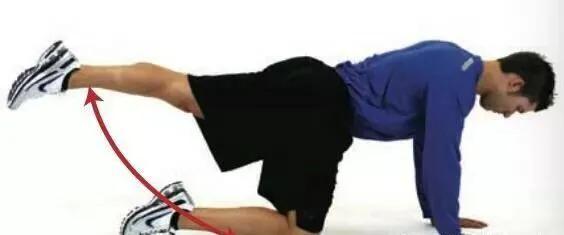
Action three: bird dog pose
1. Four-legged kneeling, focus on keeping the core tight, don’t let the waist sag. 2. Inhale, extend one leg, and the other leg keep the knee bent at 90 degrees. 3. Pause for 2 seconds. 4. Exhale and return to the two legs bending the knees simultaneously. Repeat this action 10 times, combined with breathing.
Three: learn core stability exercises
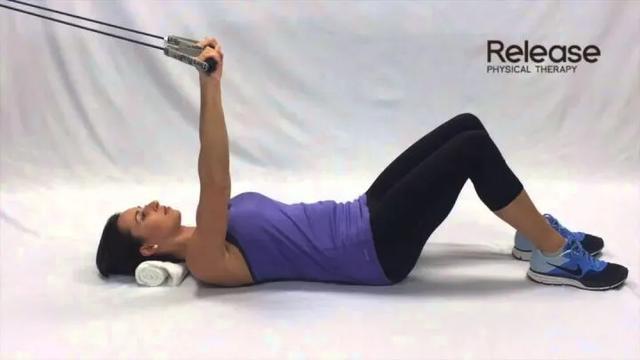
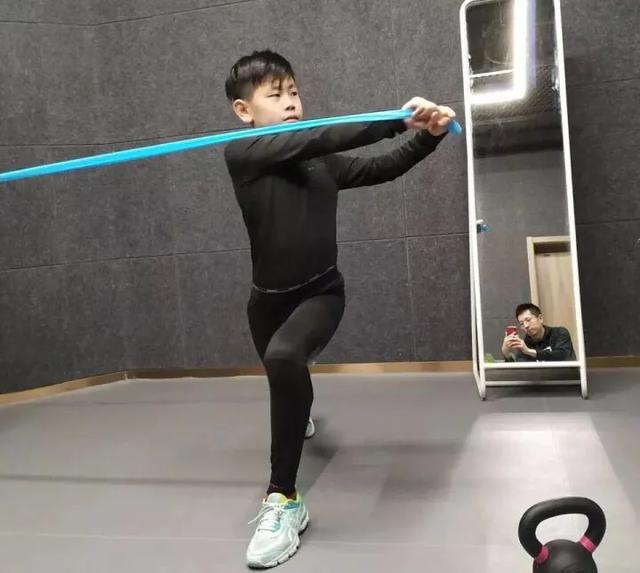
The function of the core muscles is to transmit force between the upper and lower limbs, it does not need it to generate movement. Hanging leg raises is a good core stabilization exercise.

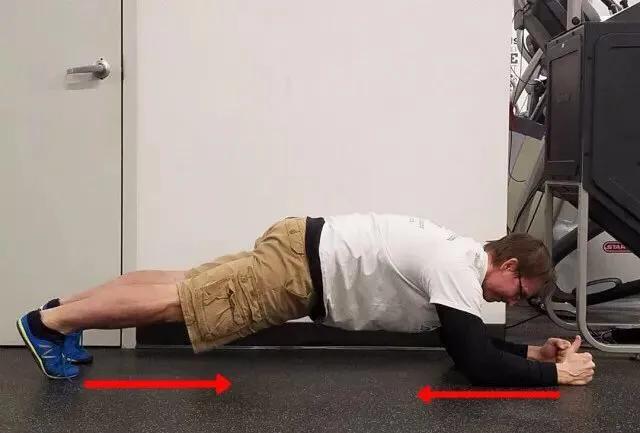
Side bridge is also a good core stabilization exercise, the key is to maintain a tight core close to the ground, if the hip joint is not extended to the full extent, you can use a resistance band to help feel the correct position.