When Steaming Buns, Don't Add Baking Powder! Here's the Correct Method for Soft and Flavorful Buns
It's a mistake to add baking powder when steaming buns or potstickers! Here's the correct method to make soft and flavorful buns that are truly (soft and fluffy) and delicious. As a true Northern foodie, I've grown up with a focus on noodles, learning dishes like dumplings, buns, and steamed buns from a young age. We steam a large batch of buns every weekend, and the dough is incredibly soft and tasty - my family loves them!
Many people say you need to add baking powder when steaming buns or steamed bread, but that's incorrect! Using baking powder will make the bun dough soft and airy, but not chewy. As a Shandong native, we never use baking powder when making buns or steamed bread. You don't need baking powder, just follow this one step, and your buns and steamed bread will be soft and delicious. Today, I'm sharing the recipe for these buns, with soft dough and fragrant, juicy filling. It's even better than meat filling!
Materials:
Flour 500g, Yeast 3g, Chives 500g, Tofu 1 block, Dried Shrimp a little, Salt to taste, Chicken Essence a little, Peanut Oil.
Instructions:
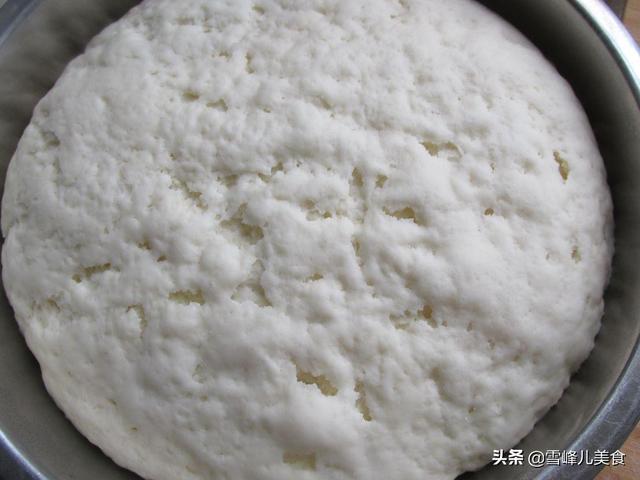
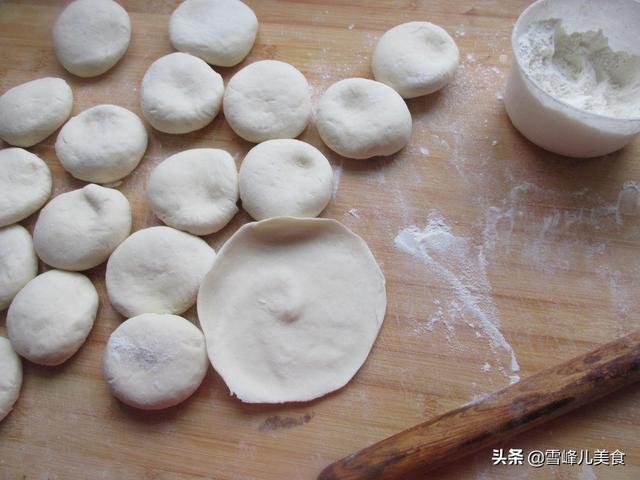
Step 1: Dissolve the yeast in water and pour it into the flour to form a dough with a soft but firm consistency. Let it rest and ferment until it becomes spongy, which takes about 1 hour. If the room temperature is lower, you'll need to extend the fermentation time.
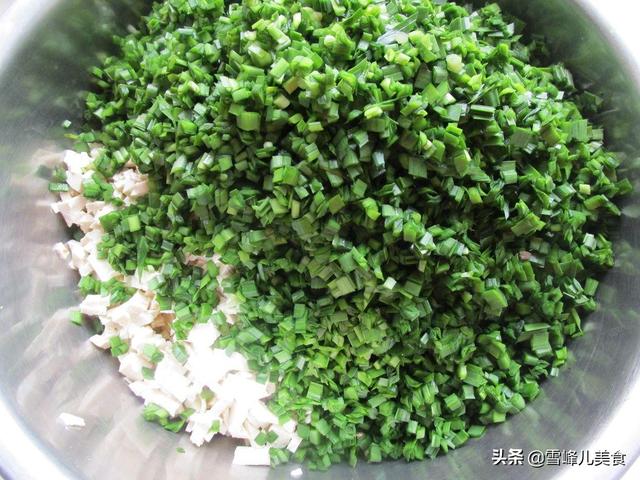
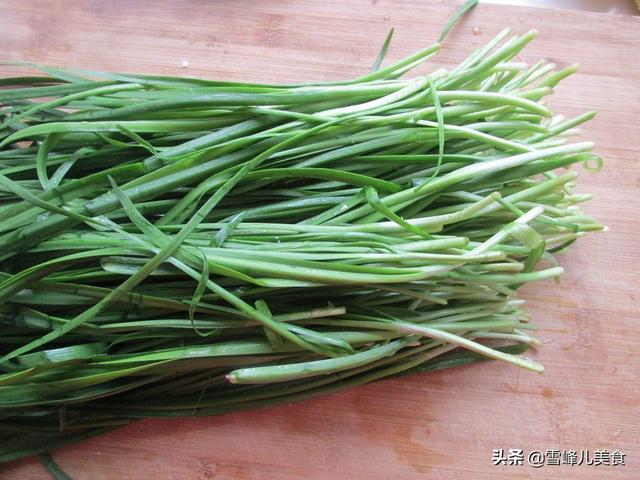
Step 2: Wash and dry the chives. Chives contain more carotene than carrots and also have antibacterial properties that can boost your immunity. It's good to eat them regularly.
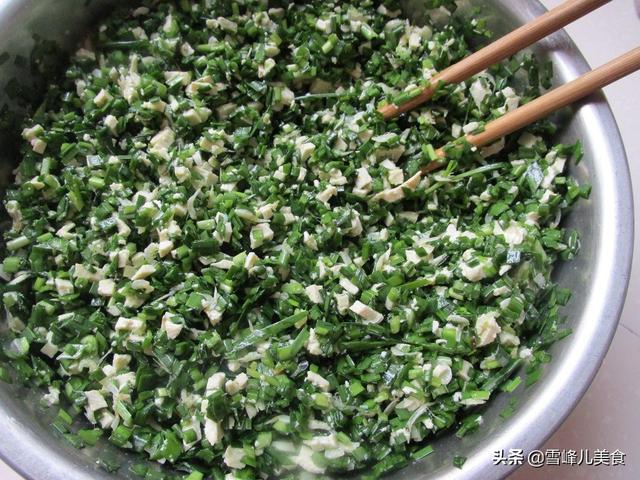
Step 3: Cut the tofu into cubes and chop the chives. Combine them in a bowl, then add a little peanut oil to prevent the chives from releasing too much water.
Step 4: Add salt and chicken essence to season the filling. A simple seasoning like this makes a delicious and fragrant filling.
Step 5: After the dough has fermented, knead it and divide it into small pieces. Use a rolling pin to roll out the dough into bun wrappers.
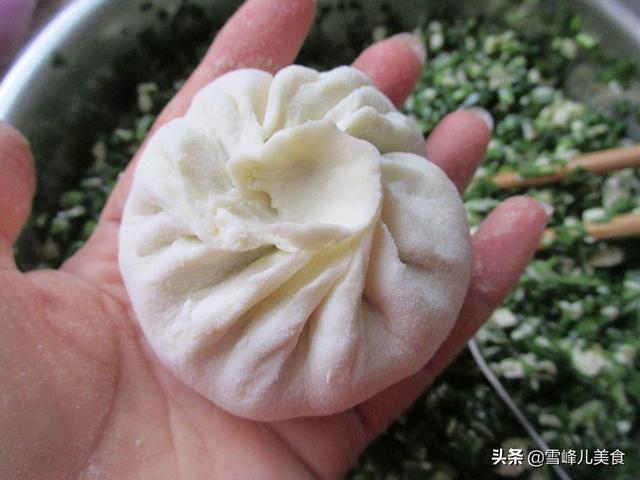
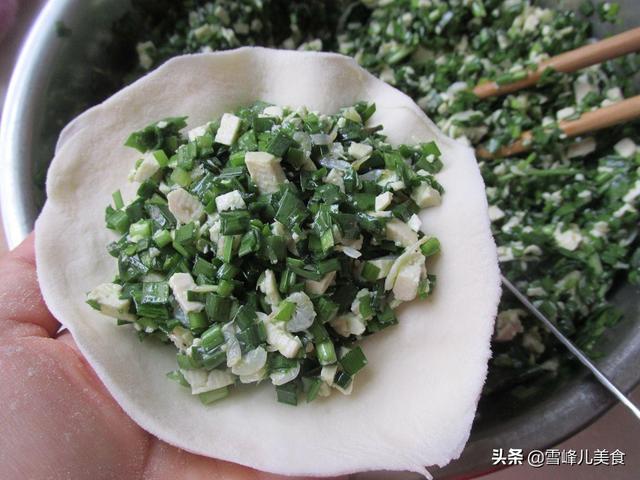
Step 6: Place a bun wrapper on a plate and add the filling. You can add a lot of filling, as the chives take time to release water, so adding more filling will make the filling seem fuller.
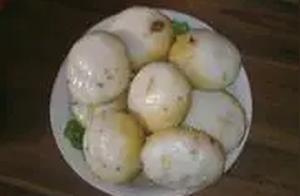
Step 7: Pinch the edges tightly to seal the bun. Once steamed, place the buns in a warm place, cover with a damp cloth, and let them ferment for about 20 minutes. This step is very important; if you skip it, the buns won't be soft and fluffy.
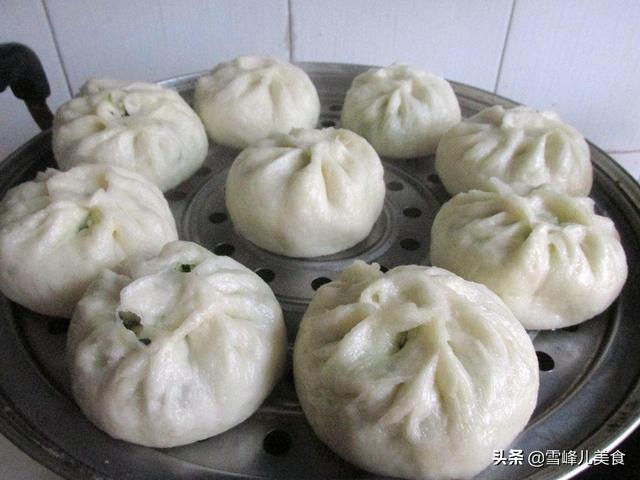
Step 8: Pour water into a pot, grease the rack to prevent sticking, and place the buns on it. After steaming for about 15 minutes, take them out. Chive buns shouldn't be steamed for too long, or the chives will discolor and affect the flavor and texture.
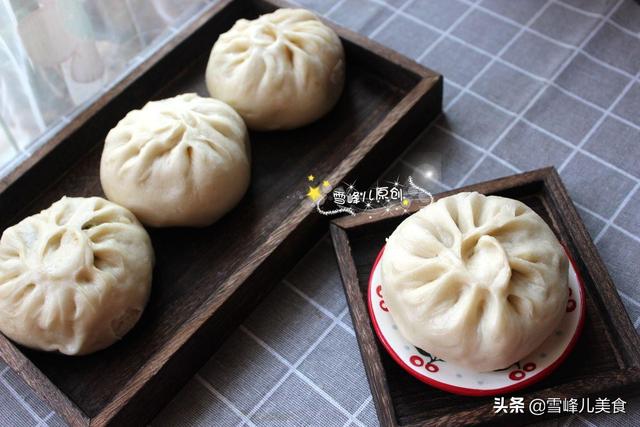
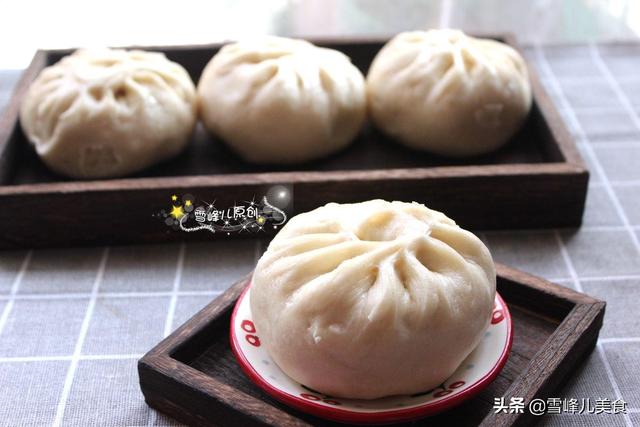
Step 9: Take out the buns and eat them while they're hot – a single bite is full of soup, and they're incredibly delicious! This filling is refreshing and not greasy, and it's better than meat filling. You can eat four of them in one go – it's so satisfying!
Pei Rong’s Remarks:
1. When steaming buns or steamed bread, always perform a second fermentation before steaming. Don’t skip this step; if you do, the buns or steamed bread will be hard and not soft and fluffy.
2. Don’t steam chive and tofu filling buns for too long. If you steam them for too long, the chives will discolor and affect the flavor.